Mistakenly emptied the Windows 8 recycle bin
It is not easy to restore deleted files after emptying the Recycle Bin folder on your Windows 8 system because there is no such inbuilt option available. Restoration of files from the recycle bin can be achieved only with the help of a robust data recovery tool. For successful retrieval of Windows 8 recycle bin data you can rely on the Recover Recycle Bin software.
What causes file loss from the recycle bin folder?
- Accidentally clicking on the Empty Recycle Bin option
- Permanent deletion of files after Shift-Delete
- Corruption of the recycle bin folder
- Deletion of files that are too large for the Windows 8 recycle bin
Emptied recycle bin files are not permanently deleted!!!
After emptying the Recycle Bin folder on your Windows 8 PC, nothing remains in this folder. The files are said to be permanently deleted from the system hard drive. Are you thinking about how it is possible to recover data after permanent deletion? Well, then when you delete any file, the index pointer that points to the deleted files space will be erased. But the data remains intact in the same location until they are overwritten by new files. Therefore, unless, and until the recoverable file is not overwritten by new file items, the reliable tools like Recover Recycle Bin can extract emptied recycle bin data.
With the help of this proficient data retrieval tool, you can perform file recovery with ultimate ease. Apart from the emptied Recycle Bin recovery on Windows 8, it also supports all other OS editions- Windows 10, 7, XP, Vista, and Server editions. The Recycle Bin Recovery software also facilitates you to perform deleted file recovery from the USB drive, SSD, HDD, memory cards, iPods, etc. With the aid of this tool, you can perform the restoration of videos, audio, images, text files and other media file formats.
Further reading: Check how to retrieve deleted files that bypass the Recycle Bin folder by employing Recycle Bin Recovery software.
Steps to Recover Files Deleted from Emptied Windows 8 Recycle Bin
Step 1: Set up the Recover Recycle Bin software on your system.Step 2: Select the Recover Files option on the main screen.
Step 3: Locate the drive partition that scans for the deleted files. Hit on the Scan button.
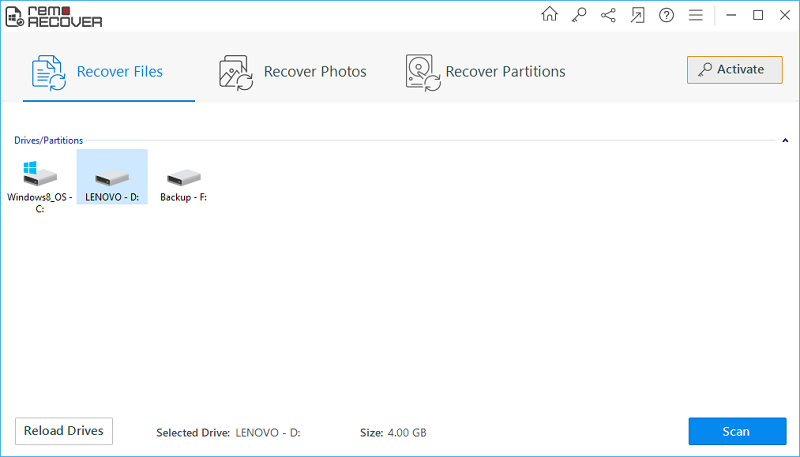
Fig A: Main Window
Step 4: The scanning process gets initiated.

Fig B: Scanning in Progress
Step 5: When the scan operation is complete you can check the restored data under Data View and File Type View layouts.
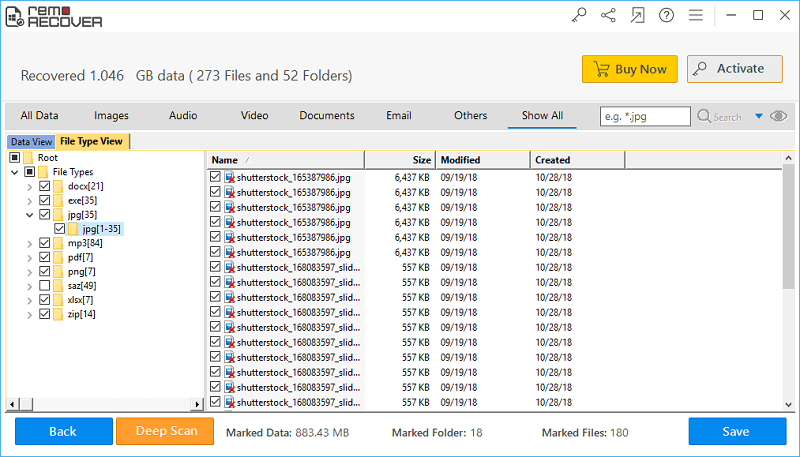
Fig C: List of Restored Files
Step 6: Right-click on the file item that you wish to preview. You can then mark them for saving.
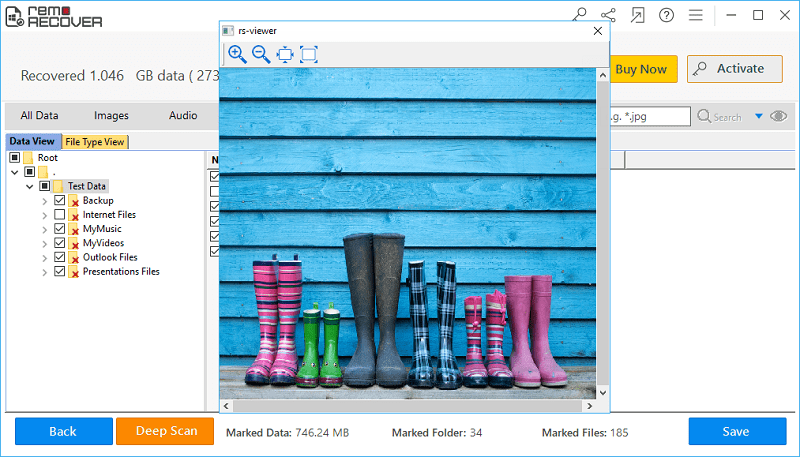
Fig D: Preview Recovered Files
Step 7: Mention the destination drive to save the regained files and click on the Save button.
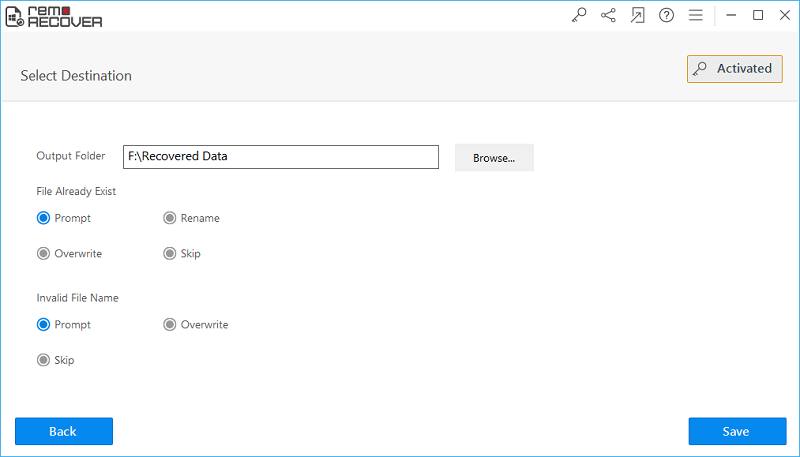
Fig E: Save the Recovered Data