Software to Recover the Emptied Recycle Bin
Have you ever deleted any file or folder from your computer and then emptied the Recycle Bin? Well, then make use of Recover Recycle Bin software to undelete emptied recycle bin files and folders.
How to restore files from the emptied recycle bin folder?
Recycle Bin is a folder or a file directory in which all the data files deleted using ‘Delete’ key or deleted from the context menu are stored. These files hold the details of their original location, so it is possible to revive those files using the ‘Restore’ option. But when you choose the ‘Empty Recycle Bin’ option, only the index pointers of the recycle bin files on the drive will be erased instead of clearing the file content. The space occupied by the deleted files will be now allocated as free space to save new file items. Hence the deleted items can be recovered unless they are overwritten by new data. Though the files remain inaccessible on your Windows system, it is possible to fetch the permanently deleted files via Recover Recycle Bin software.
Retrieving emptied recycle bin data
The Recover Recycle Bin software is an award-winning application that helps to regain the files deleted, lost, corrupt, or formatted. It is integrated with an efficient scan engine that deep scans the Windows drive partitions to extract the deleted data. As the tool operates in a read-only mode, it ensures no modifications or damages are caused to the original files. This tool proves useful in the following situations of data loss-
- Mistakenly emptied recycle bin
- Usage of Shift-Delete keys
- Corruption of recycle bin folder
- Deletion of files that are too large for the recycle bin folder
There could be a few more instances that lead to emptying or bypassing the Recycle Bin folder. Nonetheless, this expert-recommended tool can successfully bring back all the files in simple clicks. Recover Recycle Bin utility makes use of the unique file signatures to locate the files that got deleted or lost due to various reasons. Upon retrieving deleted files from Recycle Bin, The tool presents all the recoverable files in the preview window. Also, the restored files will be sorted according to their filename, size, creation date, and modified date. Moreover, this app can restore different types of files deleted from the Recycle Bin, such as photos, videos, and music files.
The software can easily recover deleted files from the Recycle Bin on Windows XP, Vista, 7, 8, 10, Windows Server 2003, and 2008. Recover Recycle Bin software helps to get back deleted files from USB drives, HDD, SSD, iPods, memory cards, etc. The application is also available in a free demo version.
Steps to Recover Files Deleted after Emptying Recycle Bin
Step 1: Install the Recover Recycle Bin software on your Windows system.
Step 2: Now opt for the Recover Files option.
Step 3: Mention the drive partition that is to be scanned for emptied recycle bin files. Then click on the Scan button.
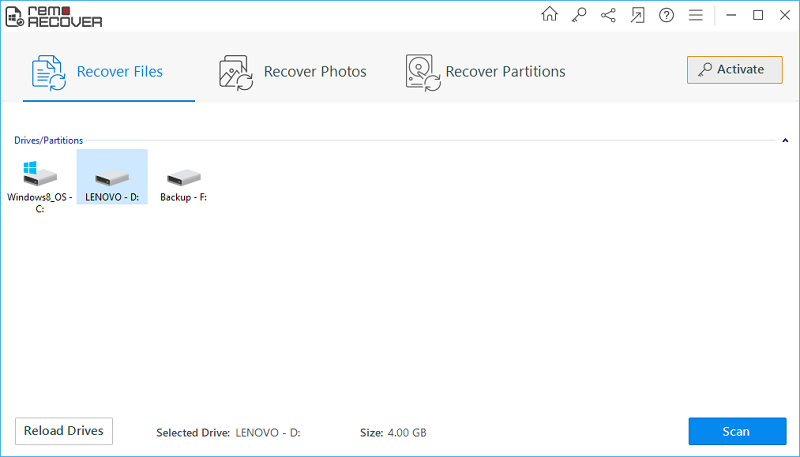
Fig A: Main Window
Step 4: The program continues to scan the retrieved files.

Fig B: Scanning in Progress
Step 5: Check the scan results under Data View and File Type View layouts.
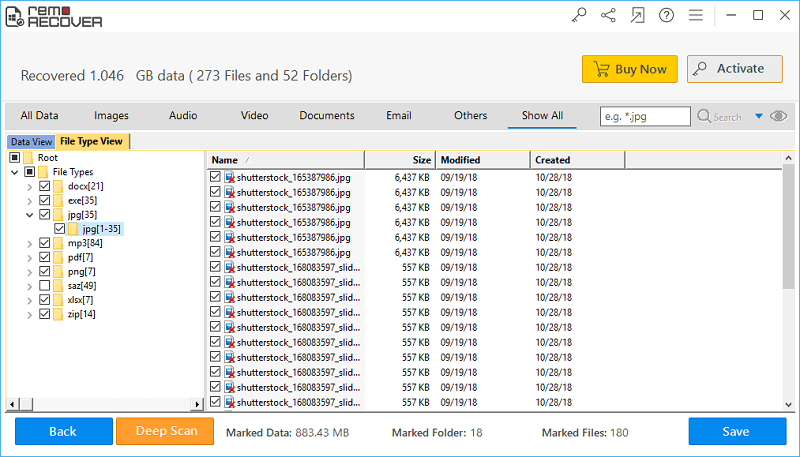
Fig C: List of Restored Files
Step 6: You can preview any of the file items in the list and mark the desired files for saving.
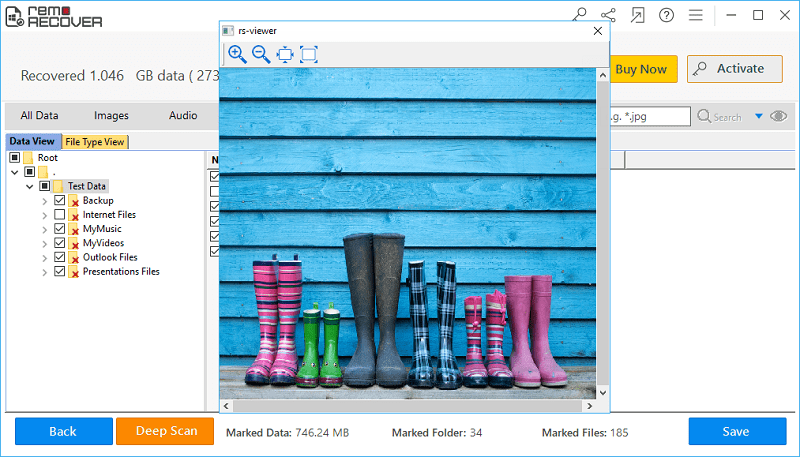
Fig D: Preview Recovered Files
Step 7: Finally set a suitable storage drive location to save all the regained files and press on the Save button.
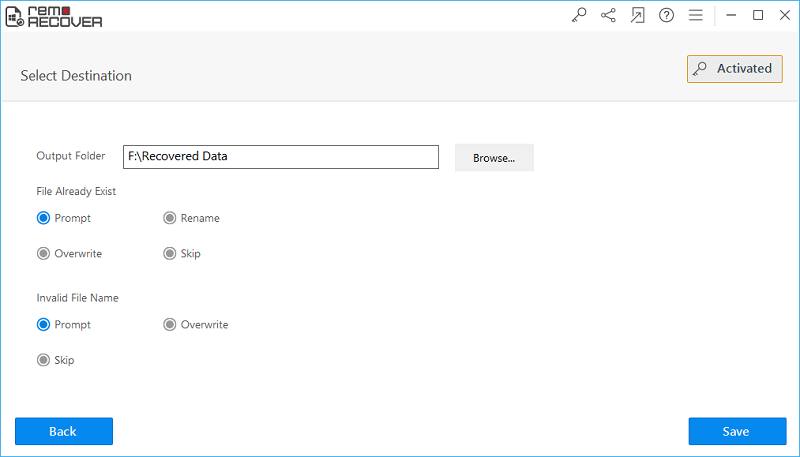
Fig E: Save the Recovered Data