How to Recover Deleted Files from USB drives?
If you delete files from the USB drive or any other external drive attached to your computer, it won't be moved to the recycle bin instead it will be removed instantly. Many users encounter data loss from the USB drive being unaware about how the USB drive files get permanently deleted. Some common instances of file loss from the removable USB drive include the following-
- Mistaken deletion of USB files
- Unintentional format operation
- Corruption due to viruses
- Improper ejection of the USB drive when connected to the computer
- Interrupted file transfer operation
The loss of USB drive files and folders cannot be restored directly from the drive or the computer. You need to make use of the robust tools like Recover Recycle Bin to bring back the permanently deleted files from the pen drive.
USB drive restoration via Recover Recycle Bin software
The Recover Recycle Bin software makes it easily possible to get back the deleted USB drive files in simple steps. Retrieval of USB drive files is possible as long as they are not overwritten by the new files. If the USB drive is used further for any write operations (adding/saving new files) then the recoverable files might get overwritten. Henceforth, you need to stop using the USB drive until the data is not successfully recovered.
Outstanding features of the Recover Recycle Bin software-
- Uses a deep scan technique to retrieve the USB drives
- Recovers files from all brands of USB drives and other external storage drives
- Lets you to restore deleted photos after emptying Recycle Bin along with deleted videos, songs, Microsoft Office documents, etc.
- Operates in a read-only mode and will not modify the original file contents
- Provides an option to preview the recoverable files
- Helps to restore files from Recycle Bin on Windows XP, Windows 7, Windows 8, Windows 10, Windows Vista, Server 2003, and 2008 operating systems
- It is easy and secure to use
How to restore the files deleted from the USB drives?
Step 1: Set up the Recover Recycle Bin software on your computer and connect the USB drive.
Step 2: Select the Recover Files option.
Step 3: Pick the logical partition that represents the USB drive. Then click on the Scan button.
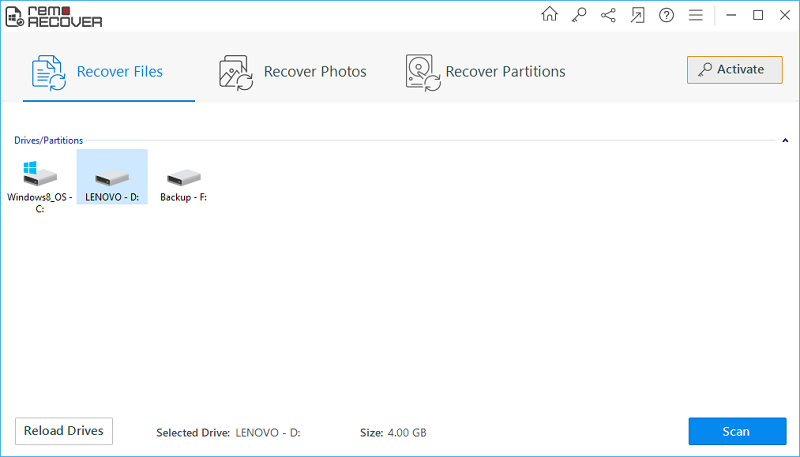
Fig A: Main Window
Step 4: The tool starts to scan for the recoverable files.

Fig B: Scanning in Progress
Step 5: All the regained files appear under Data View and File Type View layouts.
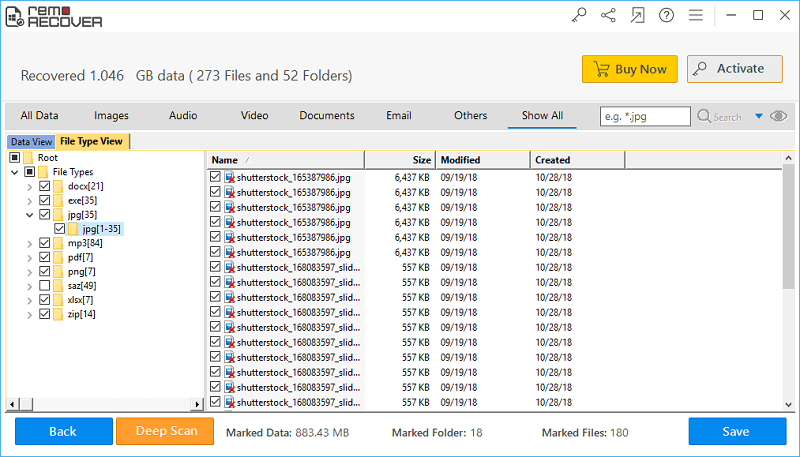
Fig C: List of Restored Files
Step 6: Preview the files recovered from the USB drive and mark the essential files for saving.
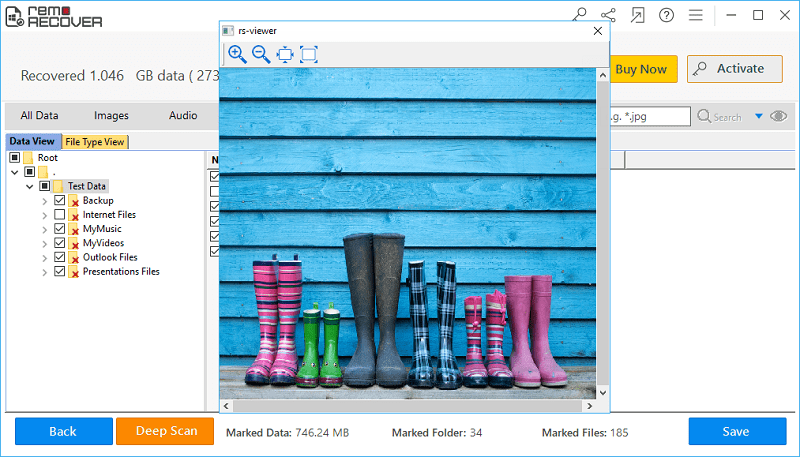
Fig D: Preview Recovered Files
Step 7: Mention the desired drive location to save the recovered USB drive files and click on the Save icon.
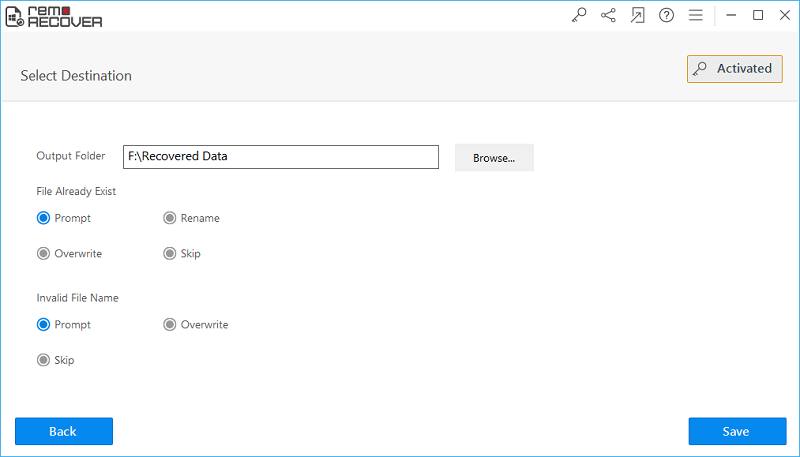
Fig E: Save the Recovered Data
Step 8: Finally, go to the destination folder location to access the files extracted from the USB drive.